In this article, I will describe how to create an Excel file dynamically with Power Automate and fill it with data from the Common Data Service. Creating those dynamically can be a bit tricky. Therefore, I will provide step by step description of how to do that.
Scenario
Let’s assume AB Company is using Dynamics 365 for Marketing and manages events within this module. The handling of Dynamics is centralized and not every event Organizer has access to the system.
Since it is crucial for the event Organizers to have a correct list of persons that have registered (and therefore will participate) one must send this information to the Organizer.
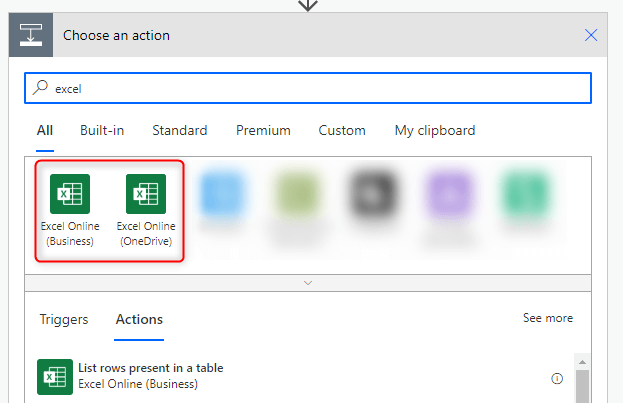
Exactly that is what a customer brought as a requirement to me a few weeks ago. I quickly logged into the Power Automate portal and searched whether there is an excel connector. I found two of those.
I thought: “Sure that’s possible. Should not be a big deal and not a problem at all”.
Problem
While creating the flow(s) it got clear that this first thought/impression was quite foolish. There are some pitfalls one must know about and avoid.
Creating a file
The first problem I encountered was that it is neither possible to create an excel file from scratch nor to change it just in “memory” of a Power Automate flow. The Actions of the Excel Online connector do need the file to exist either on OneDrive, or SharePoint.
Reference file
The UI of the actions of the Excel connector is a bit misleading here. When choosing a file that exists the Action will show the file Path. One could think that that is what needs to be provided when handling dynamic files as well, but actually we need the GraphId of the file.
Root folder
The actions of the SharePoint trigger are not uniform when it comes to the root folder. Some have the root of the SharePoint Site as a start and some do already start in the “Shared Documents” folder.
Solution
The idea is to create a template excel file that will be stored on SharePoint. Within the template, we will create a table that will be used by the action. We then copy that file in SharePoint and fill it with the needed data.
Thanks to Matt Collins-Jones for giving me the hint to this solution.
Our flow will execute the following steps whenever it is executed.
- Load the content of our template file
- Load Event Name
- Create a file in SharePoint with the content of the template file
- Get the graphId of the created file
- Load all Event Registrations
- For every Event Registration:
- Compose the row to add
- Add a row to the table
- Get the content of the file
- Send an email with the file as an attachment
We will store the file in SharePoint and use the “Excel Online (Business)” connector to add data.
Matt Collins-Jones has a YouTube series on the “Excel Online (Business)” connector. For every action of the connector, he has created an explanation video. I strongly encourage you to check it out.
Template
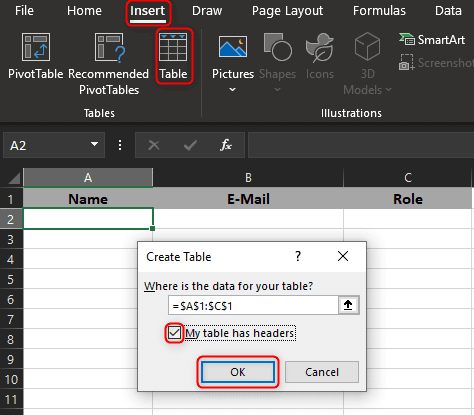
First of all, we have to create a template file. To do so we open excel and add the names of the desired columns. For this demo we choose:
- Name
- Role
The Excel connector can’t handle special characters in the column names. If you have some you will get an error that you have to provide a value for “item”. So make sure to avoid those.
The second step is to add a table to the file. We go to Insert –> Table, in the popup we check the box beside “My table has headers” and press “OK”.
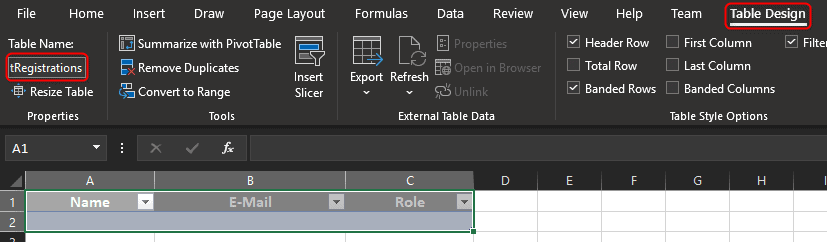
The last step within Excel is to configure a proper name for our table. Unter the tab “Table Design” you will find “Table Name” on the far-left side. We will name it “EventRegistrations”.
We will now upload the file to the SharePoint site.
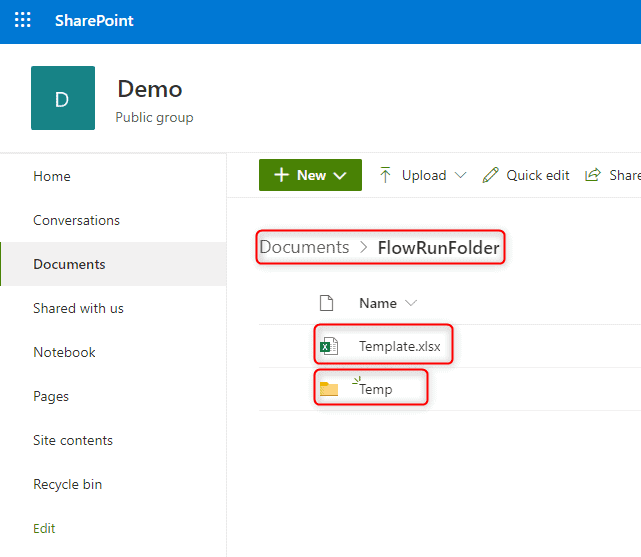
As you can see, we have created a folder “FlowRunFolder” within the root folder. Here we can find a “Temp” folder which will hold the files that the flow is creating.
Flow
Now it is time to get our hands dirty and create the flow.
Trigger
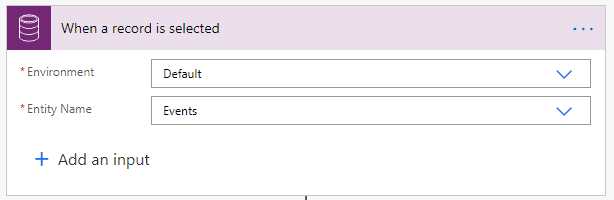
For the ease of this article we will use the “When a record is selected” trigger of the Common Data Service connector.
Please notice that this trigger is only available in the Common Data Service connector and not within the Common Data Service (current environment) connector.
Environment
As the Environment we will choose “Default”.
Note: The UI is misleading here. Even if you choose “Default” as the environment the Connector will go against the current environment. Thanks, Sarah Lagerquist for clearing that up to me.
Entity Name
Here we choose “Events”
Steps
Let’s dive into the interesting part of this article.
Load content of Template
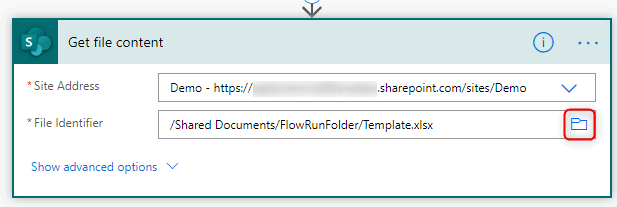
We will use the “Get file content” action of the SharePoint connector.
Here we first have to choose the Site we would like to use and then we can pick the file by using the little folder icon on the right.
Load Event Name
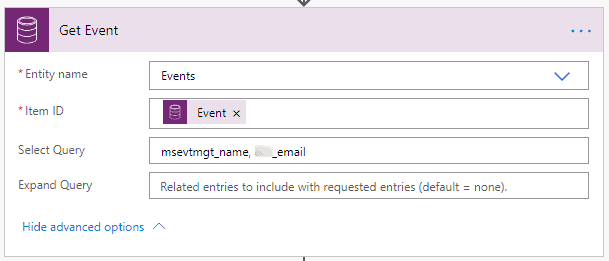
To load the event name we use the “Get a record” action of the Common Data Service (current environment) connector.
Entity name
As the Entity we choose “Events”
Item ID
The Item ID is the Event Unique identifier from the trigger
Select Query
We select the Event name (“msevtmgt_name”) as well as an custom field that contains the email we should send the mail to.
Create file
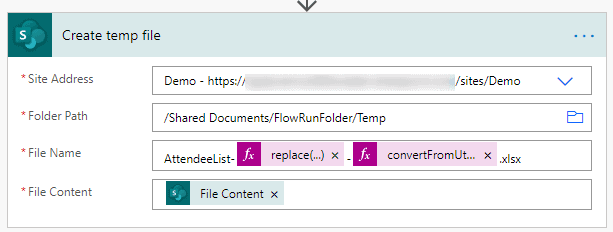
To create the temporary file, we will use the “Create file” action of the SharePoint connector.
Site Address
You choose the SharePoint site you would like to use for the temporary file.
Folder Path
Here you choose the folder you would like to store the temporary files in, by using the folder icon on the right.
File Name
In this field, you can decide on the file name (including the ending, in our case “xlsx”). We will use a combination of “AttendeeList”, Event Name, and current Date and Time. All the spaces in the event name we replace with “_”. The Date will be in the format “yyyy-MM-dd_HH-mm-ss”. See the forms belowreplace(outputs(‘Get_Event’)?[‘body/msevtmgt_name’], ‘ ‘, ‘_’)convertFromUtc(utcNow(), ‘W. Europe Standard Time’, ‘yyyy-MM-dd_HH-mm-ss’)
File Content
The file content is the output of the previous step.
Get GraphId
This step isn’t necessary if you use oneDrive. Go directly to “Load Event Registrations“
To get the graphID of the created file we have to send an HTTP request to SharePoint. To do so we use the “Send an HTTP request to SharePoint” action of the SharePoint connector.
Site Address
You choose the SharePoint site you created the temporary file in.
Method
The method should be “GET”.
Uri
This is the complex part of this step. The Uri starts with version 2.0 of the API followed by the path to the file (including the file name). The path starts with a leading “/” and should not contain the “Shared Documents” folder. To make this work we have to transform the path to a uri (so for example all “/” will be replaced with “%2F”). Fortunately, there is a function within Power Automate that does exactly that, “uriComponent“.
The prefix
_api/v2.0/drive/root:
The expression for the path
uriComponent(concat('/FlowRunFolder/Temp','/',outputs('Create_temp_file')?['body/Name']))
Headers
As a header, we use “accept” as the key and “application/json” as the value.

Load Event Registrations
To load all Event Registrations, we will use the “List Records” action of the Common Data Service (current environment) connector.
Entity name

Select Query
We would like to include the Role and contact in our list. Therefore we select the primary role and the contact field
msevtmgt_primaryrole,_msevtmgt_contactid_value
Filter Query
To get only those Event Registrations that are related to the Event we handle we will filter on the event ID (which comes from the trigger). Since we have an expand query on the contact we would like to make sure that this field is present as well.
_msevtmgt_eventid_value eq @{triggerBody()?['entity']?['msevtmgt_eventid']} and msevtmgt_ContactId/contactid ne null
Expand Query
In the Excel we would like to include the fullname and email of the contact. Therefore we add an expand query to fetch those information.
msevtmgt_ContactId($select=fullname,emailaddress1)

Creating all the queries can easily be done with the FetchXML Builder from Jonas Rapp.
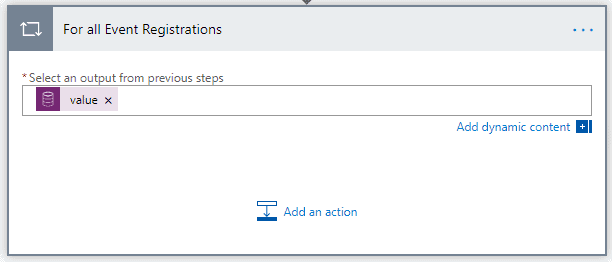
Loop
We have to execute the next two steps for every Event Registration we fetched. Therefore we will add an “Apply to each” action.
Input
As the input we select the output of the list Event Registrations step
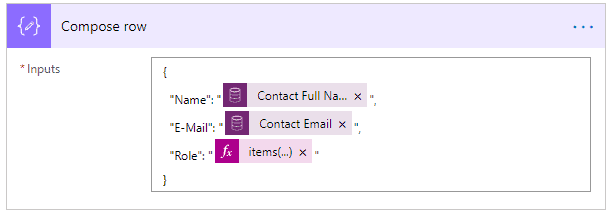
Compose row
To add a row dynamically to an excel file we have to compose the row in Json format. For that, we use the build in “Compose” action.
This step should be within the loop.
Input
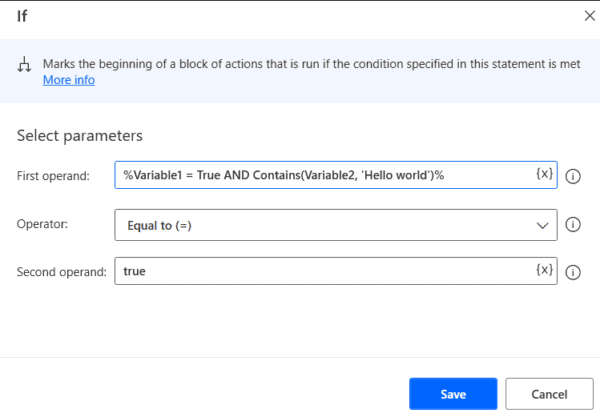
The Input of this action is a JSON object that represents a row of our Excel. Every Column should be present and referenced by the name we typed in the Template. For the demo those are “Name”, “E-Mail” and “Role”. The schema is
"<Column Name>":"<value>"
Name and Email are from the contact and can be selected from our List Event Registration straight away. The Role is a OptionSet. Here we would like to select the label and not the value (that means Attendee and not a number that no one understands). Use the following expression to achieve this
items('For_all_Event_Registrations')?['msevtmgt_primaryrole@OData.Community.Display.V1.FormattedValue'
{
  "Name": "@{items('For_all_Event_Registrations')?['msevtmgt_contactid/fullname']}",
  "E-Mail": "@{items('For_all_Event_Registrations')?['msevtmgt_contactid/emailaddress1']}",
  "Role": "@{items('For_all_Event_Registrations')?['msevtmgt_primaryrole@OData.Community.Display.V1.FormattedValue']}"
}
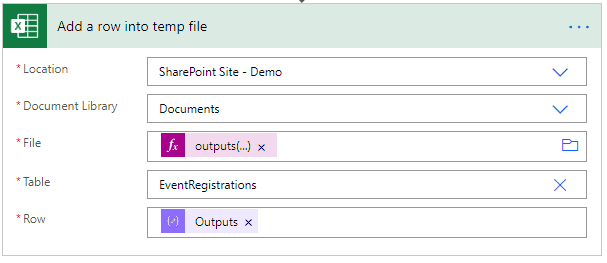
Add row to Excel
To add our composed row to the table we use the “Add a row into a table” action of the Excel Online (Business) connector.
This step should be within the loop.
Some configurations of this Action do only appear when the previous one was provided.
Location
We the same SharePoint site we used to create the file in.
Sometimes the site will not be shown in the dropdown. It is also possible to copy the URL from one of the SharePoint steps and paste it in.
Document Library
We have to choose the correct Document Library. Usually we only have one option, “Documents”.
File
Since we are handling a file that will be created dynamically we can not choose the file from the file selector. We have to provide the graphId of our temporary file.
outputs('Get_GraphId_of_temp_file')?['body/id']
If you are using oneDrive you skipped the part of getting the graphId. To get the correct file we will use the last part (after the dot) of the Id which is returned by the oneDrive create file step. To do so you can use the following expression
split(outputs('Create_file')?['body/Id'], '.')[1]
Table
Here we choose “Enter custom value” and write the name of our table we created in the Template. For this demo it is “EventRegistrations”
Row
This should be the output of our previous compose step.
Wait step
Since the step to add rows to the file is working async we have to wait a bit to be sure that the rows where added. We use the built-in “Delay” action to wait for 2 minutes.
Count
Should be “2”.
Unit
Should be “Minutes”.

Load file content
To be able to send out the file as an attachment we have to load the content of the file we created and filled. We use the same action as we used earlier, “Get file content”.
Site Address
This should be the same SharePoint Site we used everywhere earlier.
File Identifier
Here we will use the Id we get as an output from the step which created our temp file.outputs(‘Create_temp_file’)?[‘body/Id’]

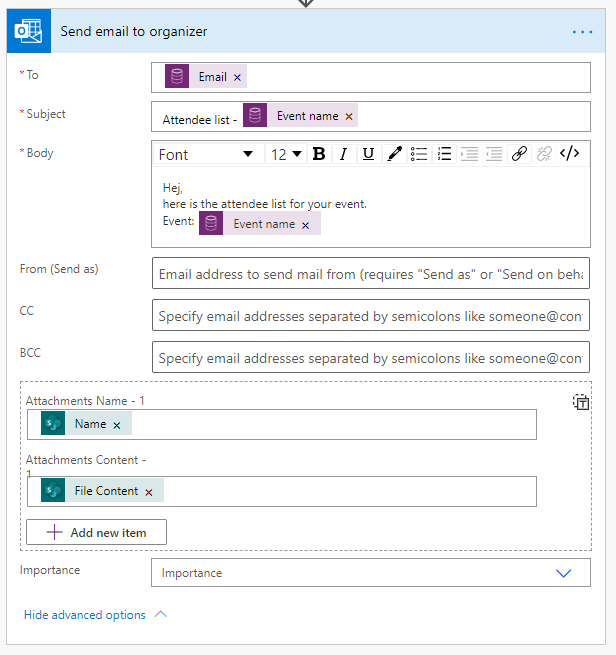
Send email
The last step is to send an email with the file attached. Here you could use whatever email connector you would like to (for example google). For this demo, we will use the “Send an email (V2)” action of the Office 365 Outlook connector.
To
As the recipient we choose the value of the custom field we created on the Event Entity and fetched with our event data.outputs(‘Get_Event’)?[‘body/???_email’]
Subject
Choose whatever subject you would like. I have included the Event name.
Body
Write a text that should be included in the mail. I have as well included the Event Name.
Attachments Name – 1
Here we choose the Name of the file we created. This is the output of the “create” step.
outputs('Create_temp_file')?['body/Name']
Attachments Content – 1
Here we choose the output of the previous step that has fetched the file content.
outputs('Get_content_of_temp_file')?['body']
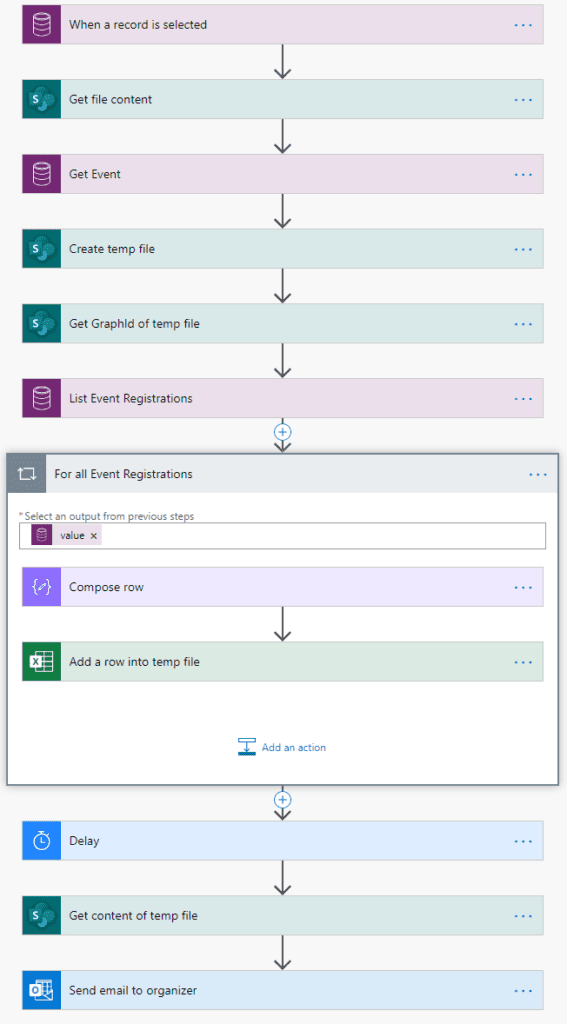
Complete Flow
In the following screenshot you can see the complete flow.
There are obviously several things that could be improved in this demo flow.
- Delete temp file
- Check if there are Event Registrations and terminate if not
- Recurrent trigger
- Error handling
I might take a look at those in future blog posts.
Conclusion
As you can see the solution isn’t overly complicated if you know what to look out for, as well as knowing how to tackle it.
I hope this article helped you. Feel free to contact me if you have any questions. I am always happy to help.
Please also look at my speaking engagements if you would like to hear me talk about something related to Dynamics 365/CDS.
For more great content, check out the Resource Centre
About the Author:
Benedikt Bergmann is a Developer focusing on the Power Platform. Coming from a .Net background he added Front-end parts (like Angular and React) to his portfolio early in his career. Today he is only working with Dynamics 365 and the Power Platform. His passion is everything around Application Lifecycle Management as well as project standardization. You can view his LinkedIn Profile for more information and follow him on Twitter. He also maintains several repositories on GitHub which contain different examples and courses about several parts of the Power Platform like PCF or TypeScript in general.
Reference:
Bergmann, B. (2020). Create and fill an Excel file dynamically with Power Automate. Available at: https://benediktbergmann.eu/2020/09/27/create-and-fill-an-excel-file-dynamically-with-power-automate/ [Accessed: 7th March 2021].
Find more great Power Platform content here.